Dutch Oven Camping Tacos
Use your Dutch Oven to make these amazing Camping Tacos on your next camping trip. This baked taco recipe can be customized with your favorite meat, beans, salsa, and cheese.

Tacos are a family favorite food in America. Hard tacos, soft tacos, fish tacos, walking tacos, you name it, people love it!
Traditionally, you cook taco meat, heat beans, and pile on your favorite toppings to create a handheld taco. This camping taco casserole is a little different, as it is all baked in one dish.
While we give directions for making this in a Dutch oven out at the campground, you can make it at home in your oven or on a grill. Home directions for this easy meal are included in the recipe notes.
Why You Will Love These Camping Tacos
Your family and friends will love these Dutch Oven Tacos because they are:
- fun to make and eat
- hearty and filling
- can be prepped ahead
- piled with favorite ingredients
- adaptable with different meats, beans, and cheese
- can be individualized with toppings of your choice
- great for feeding a large group
After you make them, we would love to hear what you think of this easy recipe.
Dutch Oven Taco Recipe
This recipe is a cross between tacos and enchiladas. We have gone with tacos because the tortillas are not rolled.
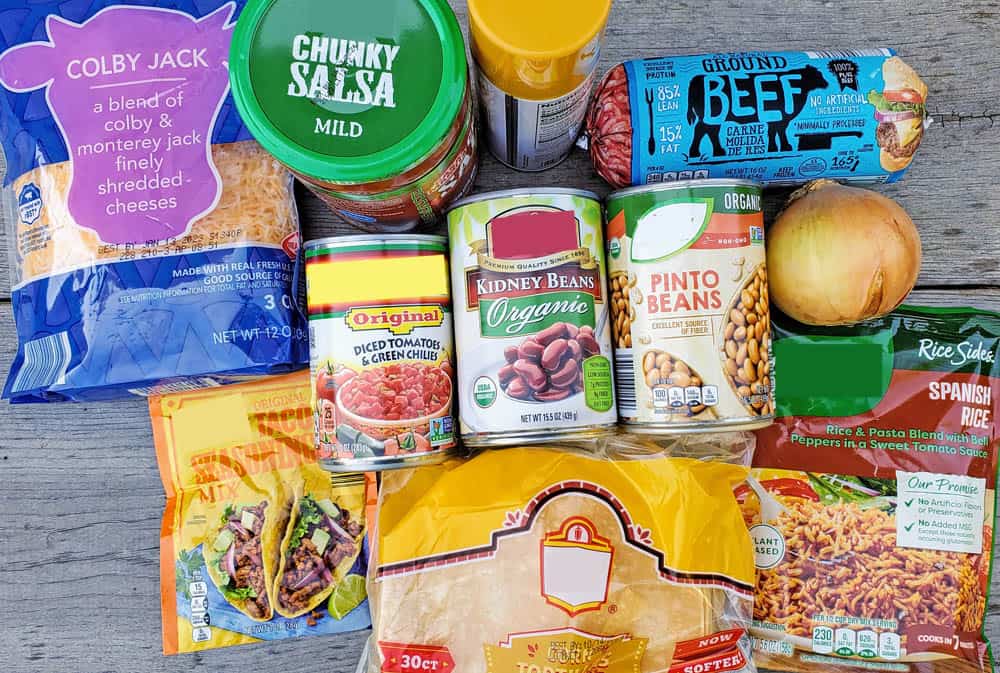
Campfire Taco Ingredients
This new camping recipe calls for the following ingredients:
- ground or shredded meat of choice
- canned beans of choice
- Spanish rice mix
- salsa of choice
- diced tomatoes & green chilies
- onion
- corn tortillas
- shredded cheddar cheese
- red or green enchilada sauce
- oil
Switch up your choices of ingredients and create a different taco meal each time. Check out this Walking Tacos recipe.
DO Camping Tacos Directions
This is one of the more involved Dutch Oven dinner recipes we posted, but the effort is worth it. You should check out Dutch Oven Chicken & Veggies, Dutch Oven Mac & Cheese, or Dutch Oven Salisbury Steak.
The basic instructions for this recipe are:
- Prepare coals for the Dutch oven
- Cook the taco meat and onions
- Add the beans and tomatoes
- Mix in the rice packet and salsa
- Assemble tacos by adding meat mixture to tortilla
- Arrange the tacos in the Dutch oven
- Add enchilada sauce and cheese
- Create a second layer of tacos
- Top with the remaining sauce and cheese
- Cover and bake for 60-70 minutes
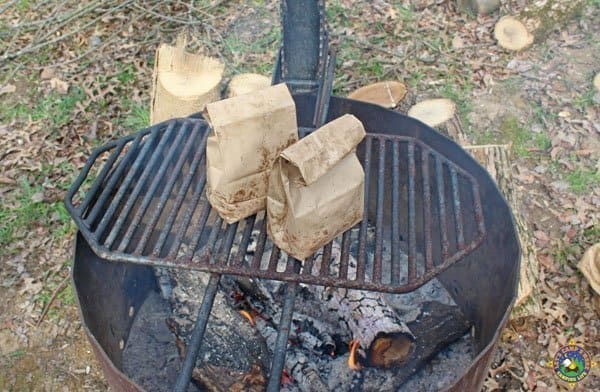
Preparing Coals
Since these are wet tacos, you can use higher heat in this recipe. Prepare at least 35 pieces of charcoal. We recommend 20 briquettes under the DO and 15 pieces on top.
Dutch Oven Tip
Need to replenish the heat over or under your oven? Use hot coals from your campfire.
Creating the Meat Filling
This recipe can be made entirely in the Dutch Oven, but the meat mixture must be transferred from the pot before assembling. Therefore, we create the meat mixture in a separate pan. A better way is to make the filling at home and store it in a Ziploc bag in your cooler for assembly at the campground.
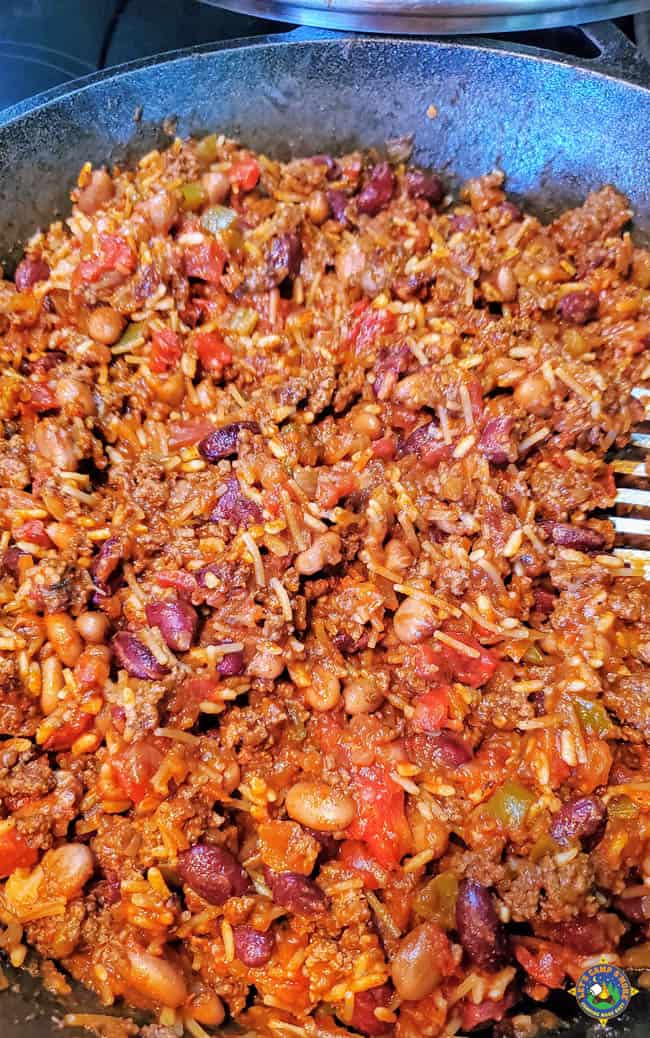
In a large skillet (we use a 12-inch cast iron skillet), brown the chopped onion in a bit of oil or butter. When they are starting to get translucent, add the ground meat.
When the meat is browned, add the taco seasoning and the liquid from the canned tomatoes and green chilies. If there is not enough liquid for the seasoning, add a little water. Let it simmer for a few minutes.
Drain and rinse two cans of beans (we used a kidney and a can of pinto beans) and add them to the meat along with the remaining canned tomatoes & green chilies. Stir to combine.
Add the contents of the Spanish rice packet. Read the packet instructions to find out how much water is needed, and add that amount of salsa instead of water. Ex: Our package asked for 2 cups of water, so we added 16 ounces of salsa.
You can add butter or oil as called for on the rice package if you want. Ours tasted just fine without it.
Mix thoroughly, cover, and simmer for 5 minutes less than the stovetop directions on the rice packet.
Assembling the Tacos
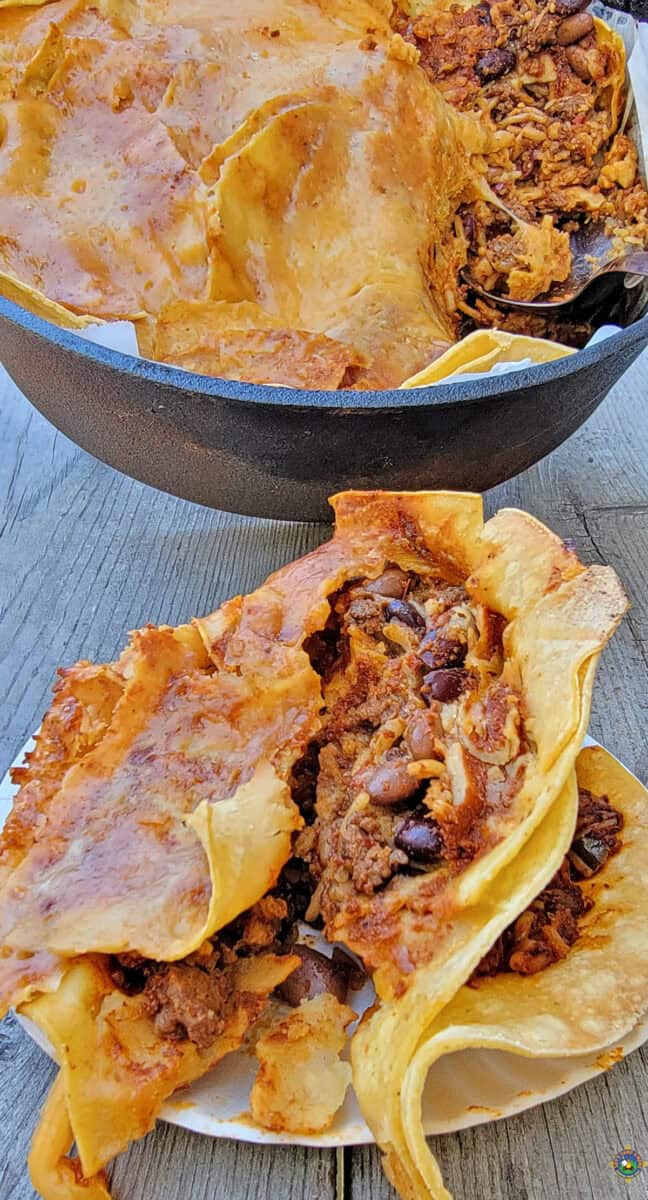
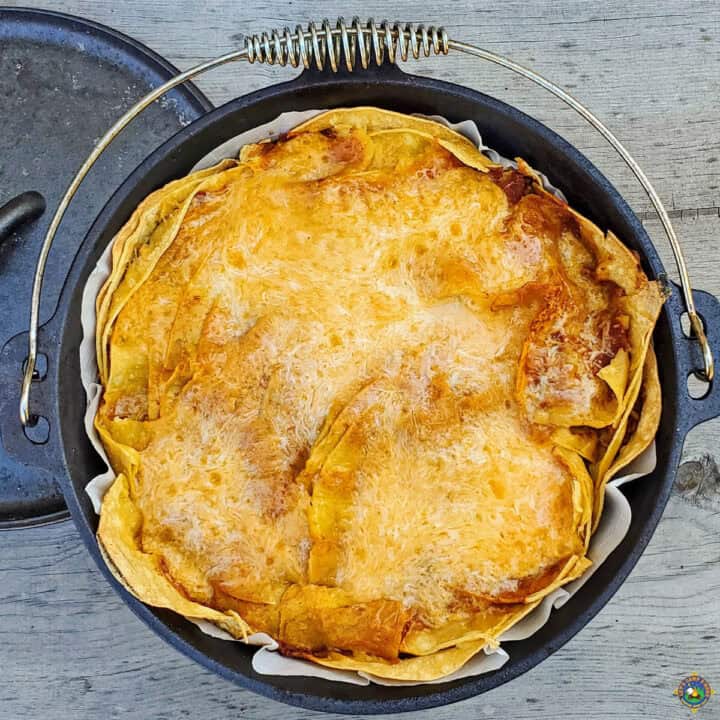
Line the Dutch oven with a liner. You can make your own or purchase paper or aluminum liners. If you prepared the meat in your pot, there is probably enough oil left on the surface to bake it unlined.
Take a corn tortilla and fill it with about two-thirds of the meat, bean, and rice filling. Line up the tacos so they are tightly packed in the bottom of the Dutch oven.
We fit 26 tacos (12 on the bottom layer and 14 on top) in our cast-iron oven.
Pour half of the can of enchilada sauce over the tacos. Sprinkle half the cheese over the entire layer.
Repeat the process, creating a second layer of tacos. If you run out of meat, break up the rest of the tortillas and lay them over the first layer.
Cover with the rest of the enchilada sauce and cheese.
Time to Bake
Put the lid on the Dutch oven. Place 20 charcoal briquettes underneath the pot and 15 coals on the lid.
Bake for 60 to 70 minutes, rotating the pot a quarter turn every 20 minutes. If needed, add or replace briquettes or coals from the campfire.
The meal is done cooking when it is bubbling, the cheese is melted, and the tortilla edges are crispy.
Top with your favorite taco toppings, such as sour cream, chopped tomatoes, green onions, jalapenos or peppers, or even hot sauce like Cholula.

Recipe FAQ
Flour tortillas will not soak up the enchilada sauce as corn tortillas do, so if you substitute with flour tortillas, cut the sauce in half. Tortilla chips are not recommended because they will get soggy.
Ground beef or turkey, shredded chicken or pork, or a vegan option such as tofu, TVP, or another meat alternative are good options. Carnitas is a good option, too.
We love using a can of black or kidney beans and pinto beans.
Cook this recipe in the Dutch oven on your grill over medium heat. Bake for 60-70 minutes.
Cover your cookware with a lid or foil and bake in a 350-degree oven for 60 minutes.
The leftovers can be stored in an air-tight container in the refrigerator.
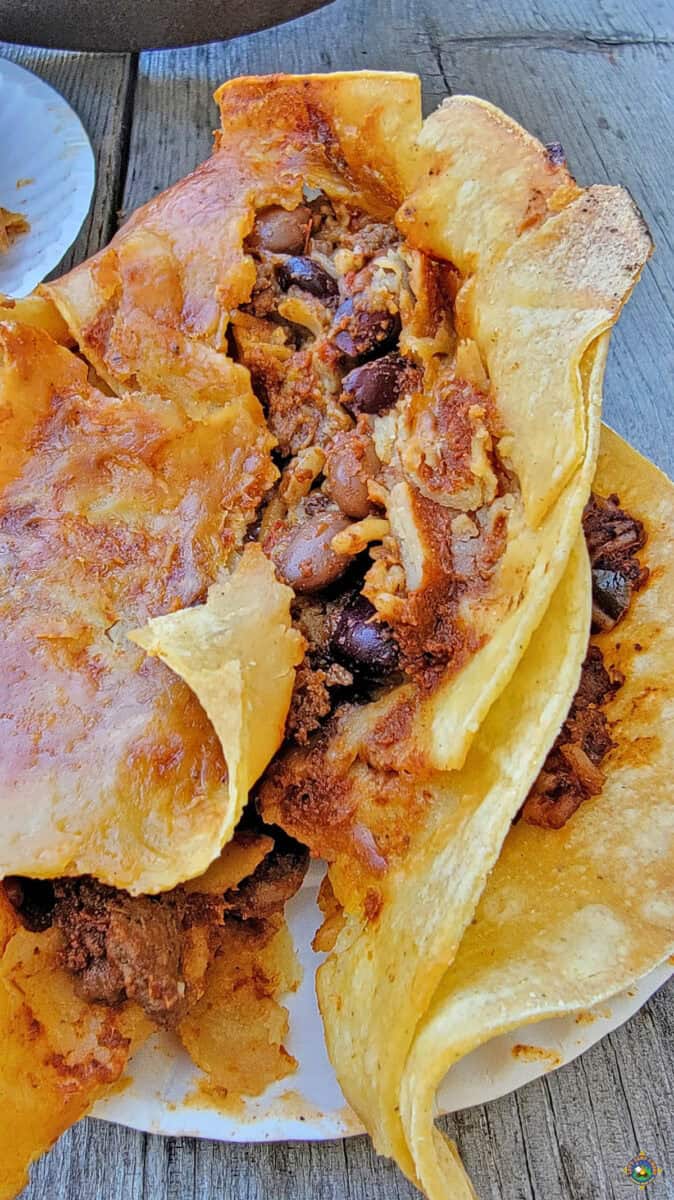
The best part of these Dutch oven tacos is the crispy corn tortilla edges that mimic a taco shell. We’re rushing to call dibs on them.
Let us know your favorite thing about these Dutch Oven Camping Tacos in the comments below, on our Facebook page, or this pin on Pinterest. We would love a 5-star review on the recipe card below.
More Dutch Oven Camping Recipes
Dutch Oven Camping Tacos
This Camping Tacos recipe may be the best way yet to enjoy one of the most popular foods around. This tasty camping meal can be adapted with your choice of meat & beans. Turn the heat up or down with salsa or added toppings.
Ingredients
- 1 pound of ground meat
- 2 cans of beans, rinsed and drained
- 1 package Spanish rice mix
- 1 jar of salsa
- 1 can diced tomatoes & green chilies
- 1 onion, diced
- 1 package of corn tortillas (30-count)
- 1 pound shredded cheddar cheese
- 1 28 oz can enchilada sauce (red or green)
- oil as needed
- optional: toppings of choice
Instructions
- Prepare 35+ charcoal briquettes for the Dutch oven
- Cook the onions in a little bit of oil or butter til translucent.
- Add the meat and stir around until browned.
- Add the taco seasoning and the liquid from the can of tomatoes & chilies. Simmer for 3-5 minutes, adding in a little water if needed.
- Stir in the beans and tomatoes & chilies.
- Read the Spanish rice package instructions to find out how much water is needed. Add that amount of salsa instead of water, along with the contents of the package. Mix thoroughly.
- Simmer for 5 minutes less than the package instructions.
- Assemble a taco by filling a tortilla ⅔ full of the meat mixture.
- Tightly arrange tacos in the Dutch oven.
- Pour half of the enchilada sauce over the first layer.
- Sprinkle half the cheese on top.
- Create a second layer of tacos.
- Break up any remaining tortillas on top of the tacos.
- Top with the remaining sauce and cheese.
- Place the lid on the Dutch oven and place 20 coals under the pot and 15 on the lid.
- Bake for 60-75 minutes, adding more coals as needed.
- Add toppings and enjoy!
Notes
Detailed directions and tips are in the post above.
Grill Directions: Bake with the lid on over medium heat for 60-70 minutes.
Oven Directions: Also bake with the lid on in a 350° oven for 60 minutes.
Recommended Products
As an Amazon Associate and member of other affiliate programs, I earn from qualifying purchases.


Nutrition Information:
Yield: 8 Serving Size: 1Amount Per Serving: Calories: 534Total Fat: 33gSaturated Fat: 15gTrans Fat: 1gUnsaturated Fat: 13gCholesterol: 107mgSodium: 1320mgCarbohydrates: 29gFiber: 4gSugar: 9gProtein: 33g
The nutrition data provided is only an estimate.