
DIY Camping Fire Reflector
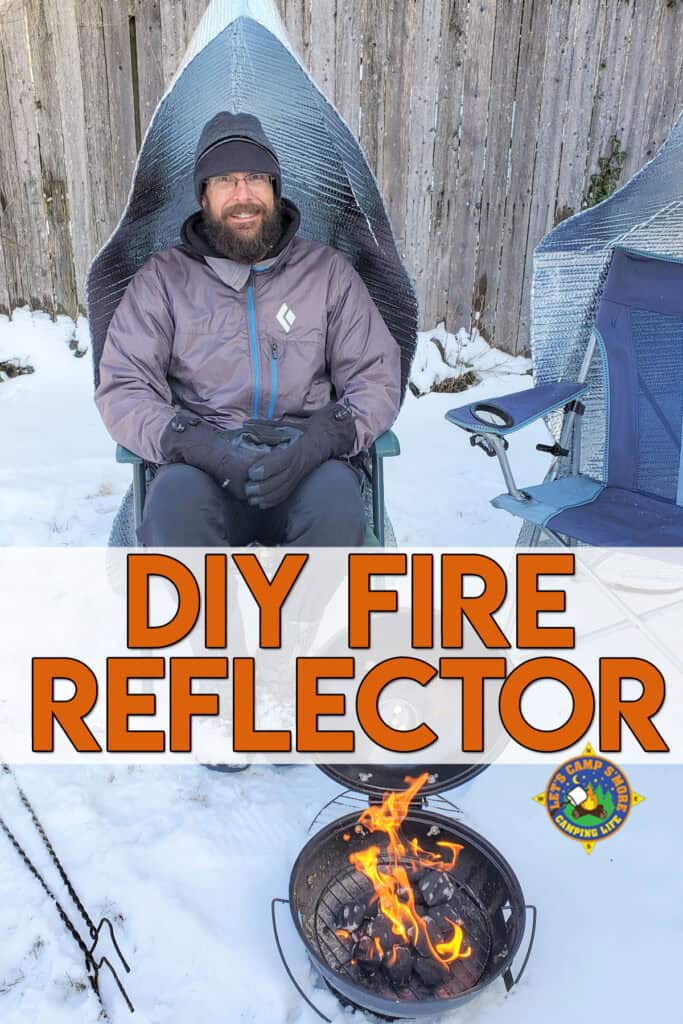
Enjoy more time around the campfire and keep your back and bum warm while camping with a portable fire reflector. This shield is a game changer when enjoying a fire during cold weather.
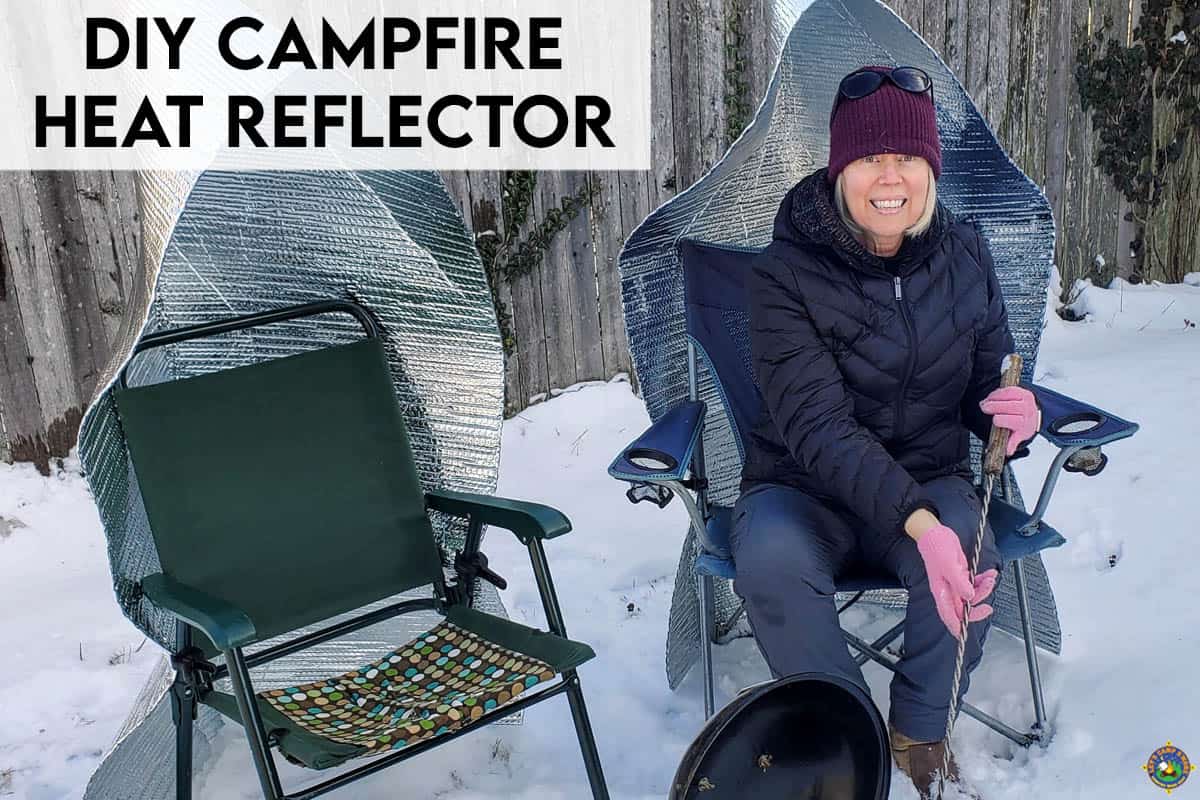
Camping is awesome most of the time. One of the most annoying things about camping is when your back gets cold while sitting around a campfire. You have to change the position of your chair or get up and stand with your backside to the fire to keep from getting too cold.
This has kept us from camping in cooler weather. To solve this issue, we have a campfire heat reflector. Now we can sit around a fire when it is cold out. This insulated shield will keep the warmth of a campfire focused in your direction.
Get your campfire going with a fire starter log or pinecone starter.
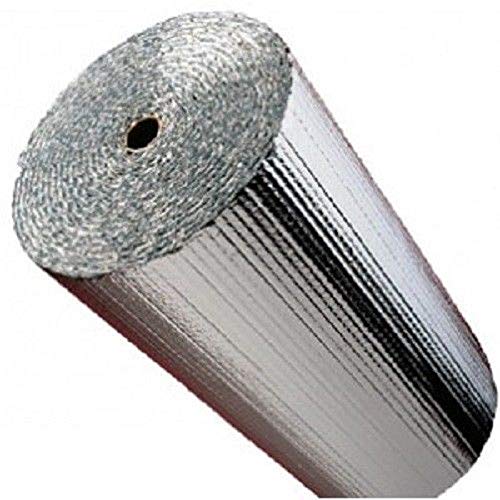
This DIY camping project utilizes Reflectix, which is an insulation item we use quite a bit. We used it for this DIY Ice Chest Cover.
Homemade Camp Fire Reflector
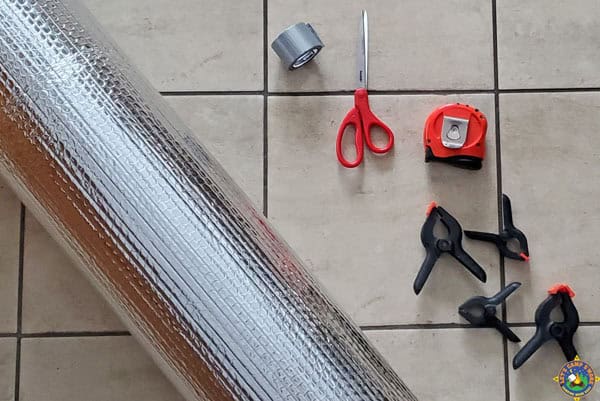
There are only a few supplies needed for this simple project: reflective insulation roll, foil-backed or duct tape, spring clamps or binder clips, scissors, and measuring tape.
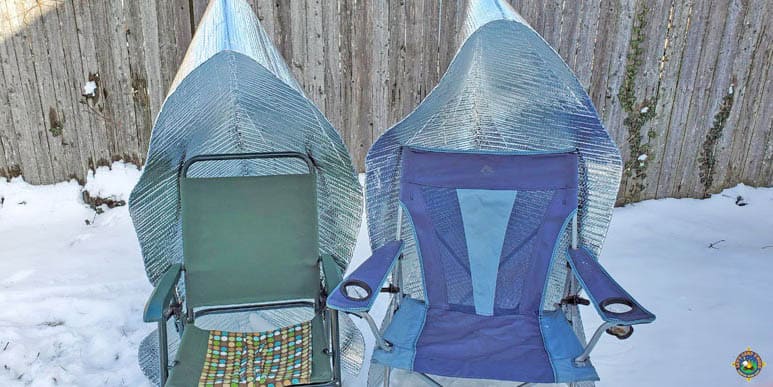
The amount of insulated bubble wrap that you use will depend on the size of your camping chair. We created ours for two different styles of seats, including the one used in our Camping Chair Repair Project. We ended up using 10 feet of 48″ wide Reflectix.
How to Create a Campfire Heat Reflector
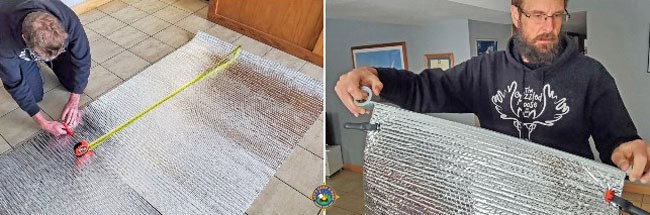
- Calculate the amount of insulation by taking the height of your camping chair and adding 2½-3 feet for headroom.
- Cut out a piece of insulation that measures height x 4 feet. If your insulation roll is narrower than 48″, tape 2 pieces together.
- Clamp the top two corners of the insulation together, creating a fold down the middle of the insulation. Cut an arch to form a curve in the fold in the back of the reflector. *see notes below
- Tape that top edge together to form a hood.
- Use a bungee cord, binder clips, or spring clamps to attach the campfire reflector to your camping chair.
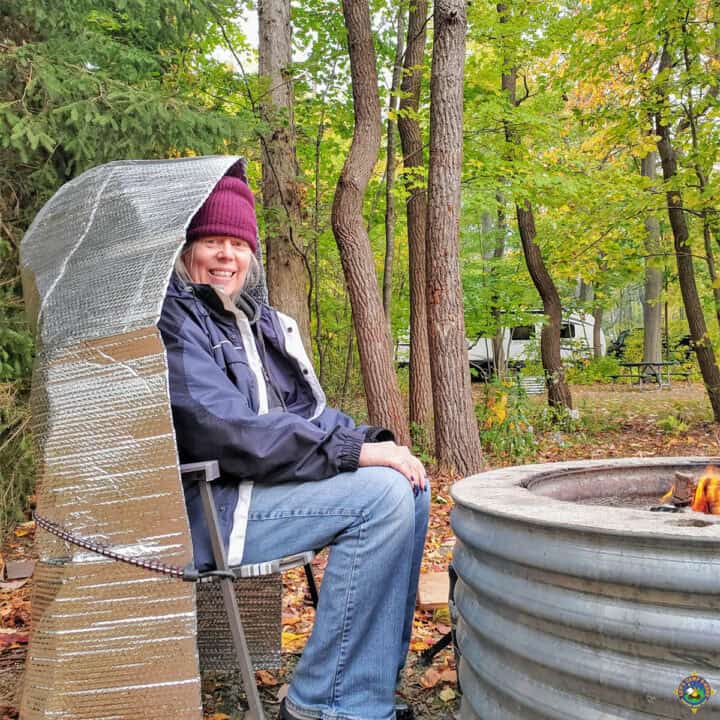
*We modified this tutorial when a few readers pointed out that it looks like a racist hood, adding a curve to the back as shown in the new fall photos in this post.
If you would like your campfire reflector to wrap around your chair more or to accommodate two chairs together, then you might need to piece together the wrap to create a larger wind block.
We used the extra tape left over from our Pop-Up Camper Solar Window Shades project. Regular duct tape or even packing tape would also work. Pop-Up owners will also like these Solar Bunkend Covers.
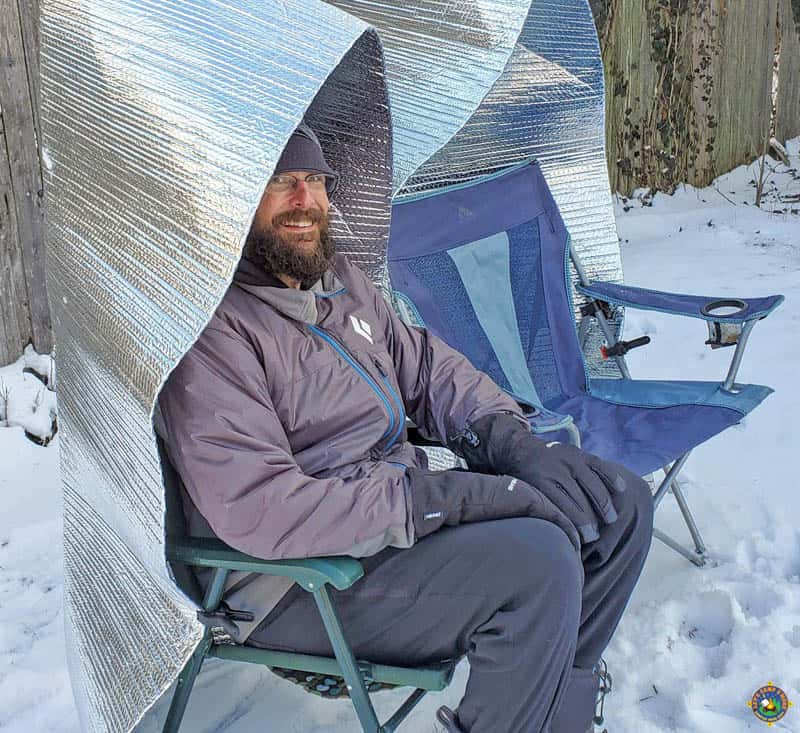
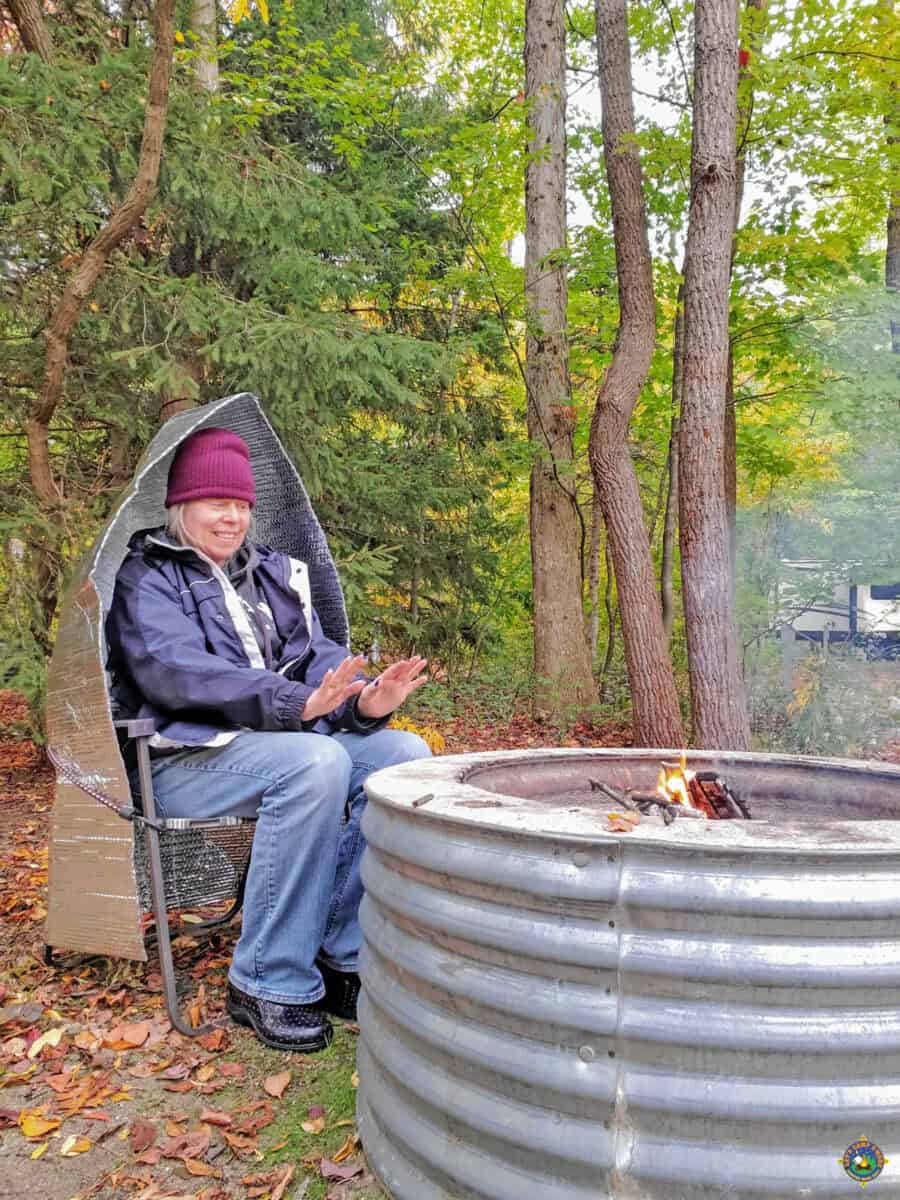
While this project is depicted as being used in the snow, it would also work in any cool weather conditions. You might even use it on a cool summer evening.
We are very pleased with the outcome of this project. It is incredible how something so simple can make such a significant difference.
If you make this project, let us know how it turns out. Did you make any adaptations? You can share a photo on Pinterest or on our Facebook page.
Camping Fire Reflector
Keep your backside warm next to the campfire with this homemade fire reflector that attaches to a camping chair.
Materials
- Duct Insulation
- Foil or Duct Tape
- Spring Clamps
Tools
- Measuring Tape
- Scissors
Instructions
- Open up your camping chair and measure how tall the seat is.
- Add approximately 2½-3 feet to that height.
- Cut out of a piece of insulation that measures that height by 4 feet. If your insulation is narrower than 48", tape 2 pieces together. Wider is OK!
- Bring the top two corners of the insulation together and clamp in place, creating a fold down the middle of the insulation. Cut an arch to form a curve in the middle of the back fold of the reflector. *see notes below
- Tape that top edge together to form a hood.
- Use spring clamps to attach the campfire reflector to your camping chair.
- Keep toasty by the campfire!
Notes
Comments were left on Pinterest that this resembles a racist hood, therefore we have modified the design with a curve in the back of the shield.
Recommended Products
As an Amazon Associate and member of other affiliate programs, I earn from qualifying purchases.


I commented last February about making a reflective shield from thrift store purchases.
I have completed another modification to my shield.
Instead of clamps along the top curved edge I used 3 large Velcro adhesive backed patches.
I overlapped the top edge about 2” and an applied my Velcro.
The overlap now keeps the top of my shield open and does not crowd my head anymore. I found that having the sides closing in around my head a a bit annoying and the Velcro addition does away with that.
John Wilson
I’d love to see this, John!
I laughed when I saw the photo but it’s actually a great idea. I never would have thought of this! Sounds cozy.
I made a reflective unit from a partial roll that I found at a thrift store a while back. The roll was 18” wide making me create mine in 3 panels.
Binder clips were used for the top curve instead of tape. Clips will allow me to fold my unit up into an 18” by 60” panel easily.
Even in the sunlight on a cool day I appreciate the warmth and the breeze being blocked.
Thank you for this idea.
I love how frugally you did this project!
Use binder clips instead of those big clamps…they come in huge array of sizes but are compact to carry.
Great tip! I will update the post.
This a very good and economical set up,Thanks for posting.